Friday, January 29, 2010

2S4Y - Laura's Sketch 44


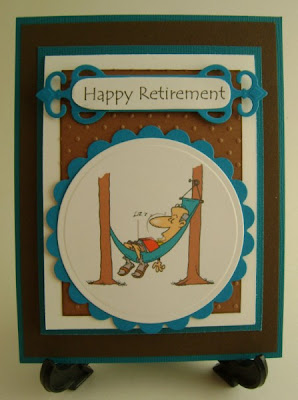
I needed to make a retirement card for a friend at church, so I decided that Laura's Sketch 44 over at 2Sketches4You would be the perfect design for what I was thinking of doing. Unfortunately I haven't acquired any stamps that would be suitable for a retirement card yet, so the image and sentiment are both computer generated. I was able to use 2 new items I received for Christmas (fancy tags, circle nesties) so I was happy about that.

Card Details: Spellbinders - Circle, Scalloped Circle, Fancy Tags; CB Folder - Swiss Dots; CS - Recollections (blue, brown, white), Coredinations (textured blue bases); Sentiment and image are computer generated.
Tuesday, January 26, 2010

Playing With Pergamano


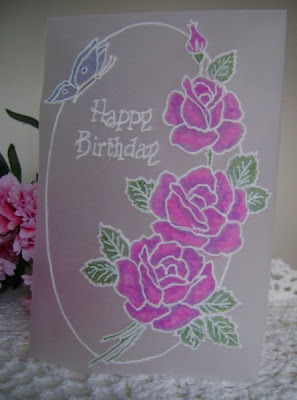
I've been in the mood lately to try some new things so I got out the Pergamano and the Diamond Glaze and made a card (Birthday Wishes). The flowers were coloured using a paint brush and ink refills. I then added the glaze to the front to give it a shiny look. I stamped the leaves on the background and then added some MS punched leaves for dimension. However, I wasn't completely happy with how this card turned out, so I moved on from there to work on different ways to add colour to a Pergamano card. The card with the lady in the garden was coloured using different amounts of pressure with the embossing tool, as well as the Gelly Roll pens. The card with the roses was coloured with water colour paints. I think it's my favourite because the colour shows up well, and was easy to work with and add dimension with lights and darks.

Handy Tip: I made the silver edge on the Labels 1 layers by using a Pilot silver metallic broad tip marker. I put a slit in the centre of the tip, put the edge of the paper in the slit, and then run it evenly around the entire edge. An easy way to add a layer without adding more bulk to your card!

Card Details
Birthday Wishes: Nesties - Labels 1, Fancy Tags; MS Leaf Punch; Stamps - Artemio (leaves), Inkadinkado (sentiment); Ink - Tinta white, MS green, Colourbox - Violet, Dusty Plum, Versamark; Ranger silver embossing powder; Pilot metallic silver marker; Pergamano tools; Judikins Diamond Glaze; Ribbon - Ruban; CS - Recollections, Bazil (silver); Green vellum and parchment paper.

Lady in the Garden: Pergamano tools; Tinta white ink; Gelly Roll pens; Parhment paper.

Roses: Pergamano tools; Tinta white ink; Water colour paints; Parchment paper.

Tuesday, January 12, 2010

Sympathy Cards


A friend of mine recently lost her mother so I wanted to make a card for her. I ended up making 2 cards and now I can't decide which one she would like the most. What do you think, which one would you send?

The top card has vellum flowers and leaves. The inside has a stamped verse, and on the green strip at the bottom I used the same border punch that I used on the front.

Card Details:
Top: Punches - Fiskars, Marvy, Martha Stewart; Stamp - Rubber Stampede; Ink - Colourbox; Pearls - Recollections; CS - Recollections; Vellum - Memories Forever.
Bottom: Stamp - Rubber Stampede; CS - Bazill (pink), Recollections (purple, white); Flower - Prima; EB Folder - CB Textile; Ink and Brad - Dollar Store.

Wednesday, January 6, 2010

Nintendo DS Birthday Invitation!

My son is having his 11th birthday next week and has asked for a sleepover with 4 of his closest friends so they can play XBox and Nintendo DS games. He just bought his first DS with his own hard-earned money (and a little help from his older brother), so he is really passionate about Nintendo right now. This morning he asked me if I could make his invitations look like the Nintendo DS, and he went on to describe what he wanted. So the design is my son's idea, I can't take credit for that, but here is what I came up with. It is all computer generated.

The front of the invitation:
The inside, with his Nintendo in the background:
A closer view of the inside:

Christmas Tags


I realized once it was too late that I hadn't taken pictures of the Christmas tags I made this year. However, I lucked out when the other day as I was cleaning up, I came across one of each of them that didn't get destroyed during the gift opening process! So, although they are used, they were still okay to get photos so I could post them. I guess it's better late than never! I actually made 4 of each style of card, two with silver mats and two with gold mats. I finished each one off with a little bit of Stickles. TFL